Sunday 25 March 2012

Even more Northumbrian Police

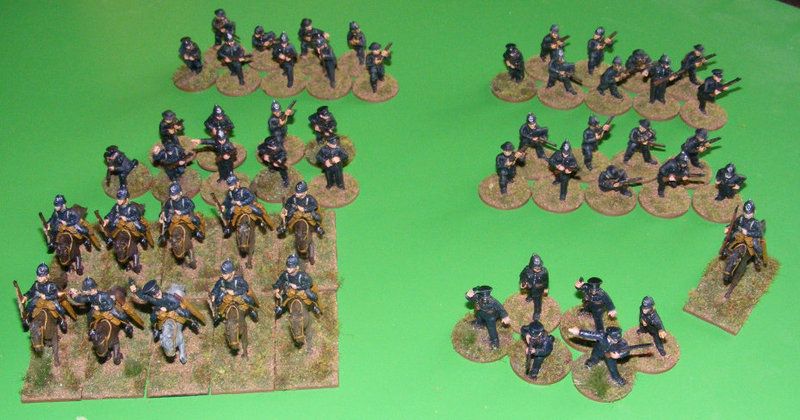
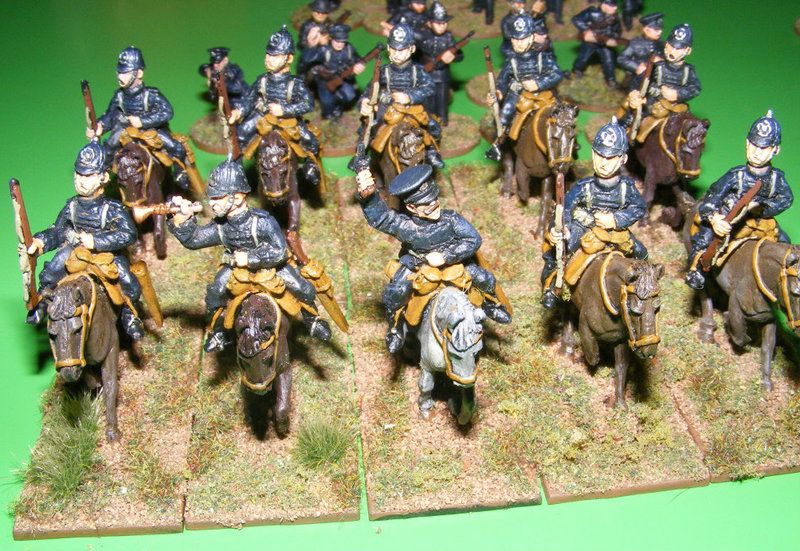
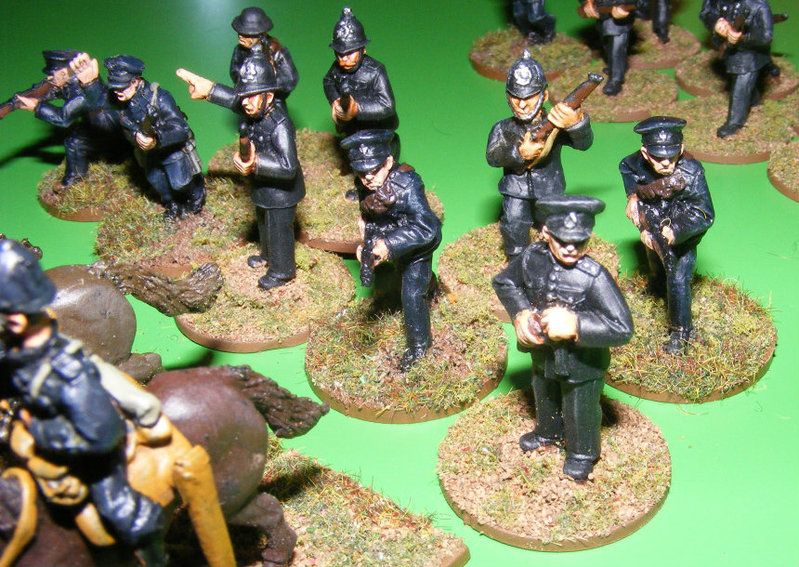
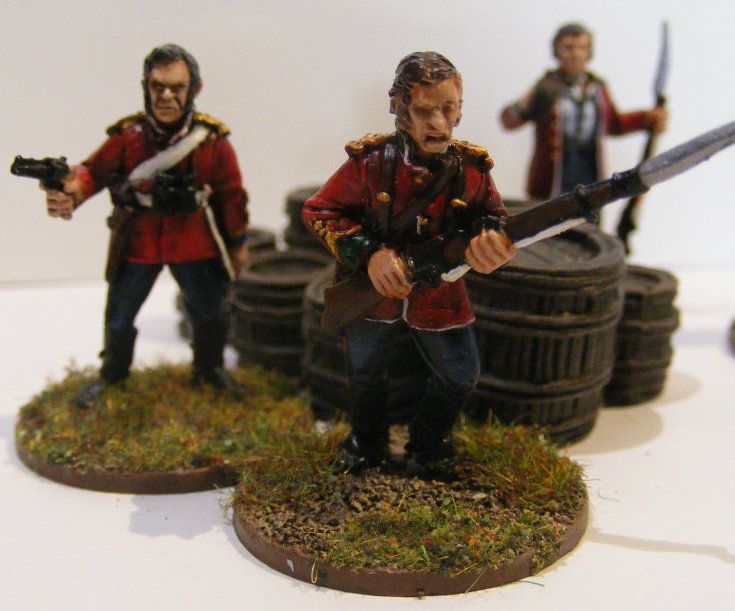
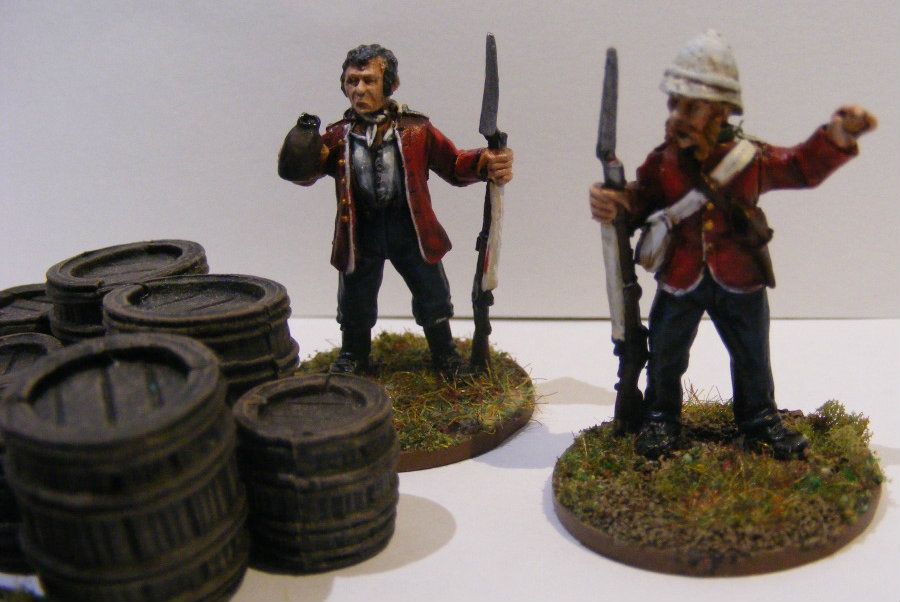
Border Reiver was nearly 6 months ago and yet I still hadn't got round to finishing off the miniatures that I got on that day.  However Mr Panzerkaput then added an entry to his blog that described his recent visit to Reiver Castings.  This great feature made me feel a little guilty that I was getting excited about new releases from Reiver when I still had 11 cavalry sitting on my desk, undercoated but going nowhere.  I then also remembered that I had some of Musketeer's excellent RIC figures waiting to be painted as well.  At this point there was no further problem deciding what to do on Saturday evening!  So here's the newly extended Police force from my 1938 VBCW collection.  I will be adding 4 more Constables with rifles when I make my next Musketeer or Artizan order so that the force will be 4 sections of 10 infantry, 10 cavalry, mounted sharpshooter and the command group.  I'm on the lookout for a suitable vehicle or two but simply haven't found anything that I like yet.  I've deliberatly stayed clear of any automatic weapons; it's rifles and pistols only for my Police.  I love the fact that our Police are not armed and feel that they would be unlikely to tool themselves up with heavy weaponry, I see them still relying on truncheons and handcuffs whenever possible.

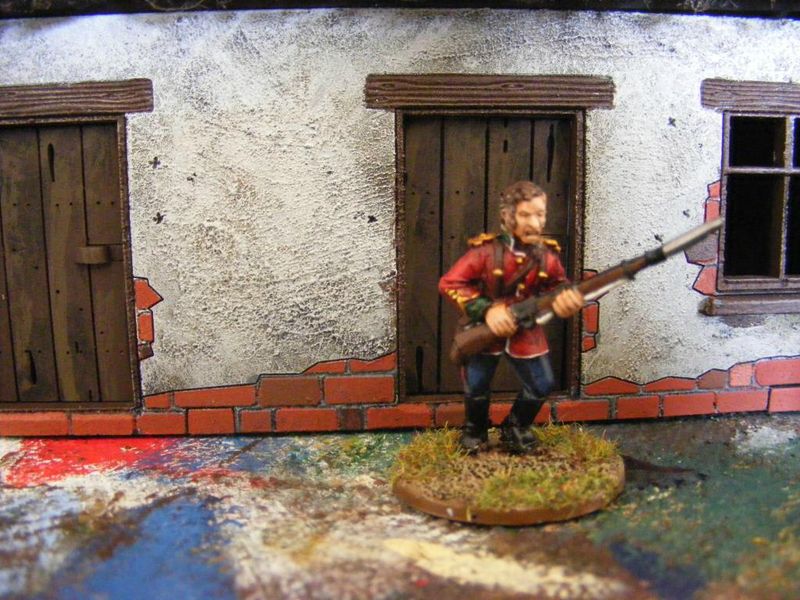
Enough rambling, here they are.  Oh and no I didn't do "on duty bands" as after many many attempts I simply couldn't get them to look right.


A little idea for mixing paints

I can't remember where I got this idea from but it works rather well.  I am sure that many of you also have the occasional problem with paint that has separated a little and doesn't get better, even if you shake it for ages.  This simple idea can help out.

Get some little glass or metal beads and add them to the paint.  It's fairly easy to lift the top off a vallejo paint and pop it in.  From then on when you shake the paint it will act like the noisy rattle thingamejig in a spray can!

Saturday 24 March 2012

The Horns of the Buffalo - Part Thirteen

I had a bit of a breakthrough last night.  Whilst rummaging in the vanishing cabinet for something I finally found the doors that I bought from 4Ground to finish the buildings.  A lick of paint and they're installed.  I'm rather pleased with the results and can't wait to get them deployed!  Just another hundred or so Zulus to finish first though.  Please excuse the lack of focus, my macro is playing up today.  However I am firmly convinced that these doors are worth every penny of the £4.50 + P&P as they really finish the buildings off nicely.


Part 1
Part 2
Part 3
Part 4
Part 5
Part 6
Part 7
Part 8
Part 9
Part 10


Friday 23 March 2012

Quiet Friday Night In

The Memsahib has been despatched on a hen night.  The groom needed somewhere to go.  Guess what's happening?  Yes, I am finally getting an evening of gaming!!!

Sadly it's not 1938 or Zulus as I need to learn the rules for Flames of War for an event that the Station club is hosting in a few weeks time.  Still, at least it's chance to christen the roads and rivers!  Here's hoping that I don't lose to badly tonight!

War Memorial

At the weekend I found myself reading Wargames, Soldiers & Strategy for the first time.  Not a bad read at all.  However what really grabbed my attention was a review of a new War Memorial being produced by the Sgt's Mess.  I've never heard of these guys before but really liked the idea of adding a little more realism to my tabletop.  They are meant for 20mm rather than 28mm but I reckon that this will work just fine for 28mm.  I think that they sculpted it to look like a WW1 soldier so perfect for a Great War Memorial that might be found in any village or town around the country in 1938.

Another great thing about this manufacturer is their public support for Help for Heroes.  Other than that I only actually ordered the piece on Wednesday and yet it arrived here today!  The moulding was very neat and it took the paint pretty well.  I've tried to represent a weathered bronze statue.  Here's a few piccies of the piece before and after painting.


The Horns of the Buffalo - Part Twelve

After finally finishing the buildings yesterday I was at a bit of a loss as to what to paint as the lead mountain is rather large at the moment.  As the wine went down I decided to have a go at some of the British characters that I had undercoated and waiting for paint.  Considering that by the time I finished I was very much worse for the wine they are ok.

I did discover though that the static grass applicator is not much use with metal miniatures as every time it comes close enough to the miniature to make the grass stand up sparks start flying!


Part 1
Part 2
Part 3
Part 4
Part 5
Part 6
Part 7
Part 8
Part 9
Part 10

Thursday 22 March 2012

The Horns of the Buffalo - Part Eleven

A most productive afternoon.  Having grown bored of painting bits of our new van and more than a little light headed I decided to crack on with the hospital.  Considering that painting the bricks demands a steady hand and I don't have one the overall effect is ok.  I'd love to have been able to simply drybrush the bricks on but the way that the mortar is cut into the MDF this is not possible which means that the paint job is a lot more paintstaking than I'd normally like.  I have got the extra doors etc to do still but I've lost them somewhere in the vanishing cabinet.


Now to decide on what to paint next, the Heroes of Rorkes Drift stand out but there's also a lot more Zulus and British Infantry to be done, or my recent large acquisition of Musketeer miniatures or the British 7 Pounder & crew.  So many miniatures and so little time!


Part 1
Part 2
Part 3
Part 4
Part 5
Part 6
Part 7
Part 8
Part 9
Part 10

Monday 19 March 2012

The Horns of the Buffalo - Part Ten

I bet some of you were thinking that I had abandoned the Anglo-Zulu war in favour of scenics.  Well I did take a bit of a break to make my roads and rivers and I was seriously tempted to spend some of this week's leave making a graveyard.  Then I noticed that the recently tidied vanishing cabinet is still full on the middle shelf because of the undercoated Rorke's Drift buildings.  So I decided that I'd get them finished.  It's taken most of the day but the storehouse is now finished.  Painting the bricks was incredibly dull and made worse by a fearsome hangover this morning.  All I've got left to do now is to find an excuse to use it in 1938 VBCW as well as the Anglo Zulu war!  Anyway, enough rambling, here's the picture:


Part 1
Part 2
Part 3
Part 4
Part 5
Part 6
Part 7
Part 8
Part 9
Part 10

Sunday 11 March 2012

Rivers - part one

The road project has been followed by a river project.  The techniques used were rather similar to those used for the roads although there were a few subtle differences as I have a new toy - a static grass applicator

1.  I used the same flooring but used wider pieces to allow this to look like a small river rather than a stream.  I built up the banks using the same pre mixed filler and then textured them with the same mix of powder and coral sand as I'd used for the roads.

2.  I sprayed everything black and then painted it brown.  I soon ran out of the original brown poster paint that I'd mixed for the roads so swapped to an emulsion tester pot that I'd found at the local Homebase that was pretty much the same colour.  This had a much stronger pigment so went over the black undercoat better.  I then drybrushed with English Uniform followed by German Camo Beige.

3.  I really struggled to get the water colour right.  Real rivers aren't blue although wargames ones often seem to be!  Eventually I settled on a very dark blue/brown colour.  It's not that true to life but seems to work ok.  I deliberatly slightly undermixed the paint to give it a very subtly streaky effect to leave the colour less solid. 

4.  The whole pieces were then sprayed with Army Painter Matt Varnish.


5.  I then changed the technique slightly.  I covered so areas with my normal basing mix but move of the pieces were covered using my new static grass applicator.  This is a brilliant tool and I think that the effect achieved is great.  Basically it makes the static grass stand up on end.  Noch make one for over £100 that I am sure is excellent but it is out of my price range!  I got mine off ebay for less than a fifth of that figure but it's worth every penny.  Basically it is an electric fly swat with a tea strainer on the end.  This charges the static grass so that it stands on end when it lands on the piece.  The only snag is that it emitts a high pitch squeal when in use that our cats and African Pygmy Hedgehog dislike so I have to use it in another room.

6.  Obviously at this point the water looked far too matt so I added a layer of Army Painter Strong Tone Quick Shade dip.  This gave a lovely effect with it's own colour although I might still add another layer of clear gloss varnish as it's not as shiny as say the liquid water effect that I've used elsewhere.  The bridge is from PMC Games.


7.  The final task was to add some extra texture to the surface of the water in the places where it would be flowing faster.  I did this using Woodland Scenics Water Effects.  I've had this in the cupboard for years and never tried using it.  It went on well but it'll be another 24 hours before I get to see whether or not it looks any good.

Saturday 3 March 2012

Roads - Part 5 - The End of the road?

I am pleased to say that the road project is finished!  Well, sort of.  Firstly, I've made a start on some rivers, which by their very nature need to tie into the roads.  Firstly they will need to be forded by the roads and secondly I have a couple of road bridges from the very talented PMC games that will cross the river at a couple of points.  Once all that is done then I'd like to add a couple of sections to the road that have a pavement to represent the road going through the village.  However, that is likely to be months away if I even ever get round to it at all!  At some point I need to get back to some Zulu goodness.

Anyway, here's a few shots of the roads.  They've not turned out how I envisaged but they're good enough I think.  Well, it's academic if not as this is as good as I can do!


I'm was thinking that I might need to add another junction and maybe another road end, but then I found a junction that I had painted and not yet flocked so there is one more piece than shown above.

A little bit of close up detail:


One of the junctions:


Unfortunately Lt Grubber decided to drive his little tank down the road and showed that it is actually a rather narrow track.  Maybe I'll need to make a second wider batch at a later date.


So that's it for roads for a while.  The rivers should be along soon.  If I get to work in the vanishing cabinet and ignore the list of jobs that my darling wife has left me!

Roads - Part 1

Roads - Part 2

Roads - Part 3

Roads - Part 4

Roads - Part 5 - The End of the Road?

Friday 2 March 2012

The Vanishing Cabinet

It's Friday night, I've spent most of the day van shopping for the wife before getting a couple of hours on the roads project.  I want to finish that one but acrylic water effect stuff takes an age to dry!  I then even based up a load of miniatures that were sitting around.  I was going to try talking to the wife but she's engrossed in some awful TV programme.  Instead I'd thought that I'd let you see where the chaos and occasional creation takes place, the Vanishing Cabinet.  It is so called because my wife can make anything of mine from around the house vanish by shoving it in there!


It's just a bog basic Ikea corner desk unit thingy but it does me proud.  Of course, if you think that it is a little chaotic then you should check out the miniature cupboard!


I really should work out why the display cases are misaligned by about 5 degrees!

Hopefully I'll finish the roads project tomorrow and get photos up by the end of the weekend.  Right now I'm going to try to work out how to make some halfway decent rivers!