The road project has been followed by a river project. The techniques used were rather similar to those used for the roads although there were a few subtle differences as I have a new toy - a static grass applicator!
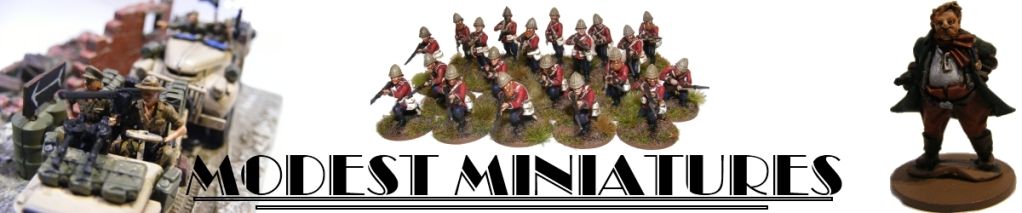
1. I used the same flooring but used wider pieces to allow this to look like a small river rather than a stream. I built up the banks using the same pre mixed filler and then textured them with the same mix of powder and coral sand as I'd used for the roads.
2. I sprayed everything black and then painted it brown. I soon ran out of the original brown poster paint that I'd mixed for the roads so swapped to an emulsion tester pot that I'd found at the local Homebase that was pretty much the same colour. This had a much stronger pigment so went over the black undercoat better. I then drybrushed with English Uniform followed by German Camo Beige.
3. I really struggled to get the water colour right. Real rivers aren't blue although wargames ones often seem to be! Eventually I settled on a very dark blue/brown colour. It's not that true to life but seems to work ok. I deliberatly slightly undermixed the paint to give it a very subtly streaky effect to leave the colour less solid.
4. The whole pieces were then sprayed with Army Painter Matt Varnish.
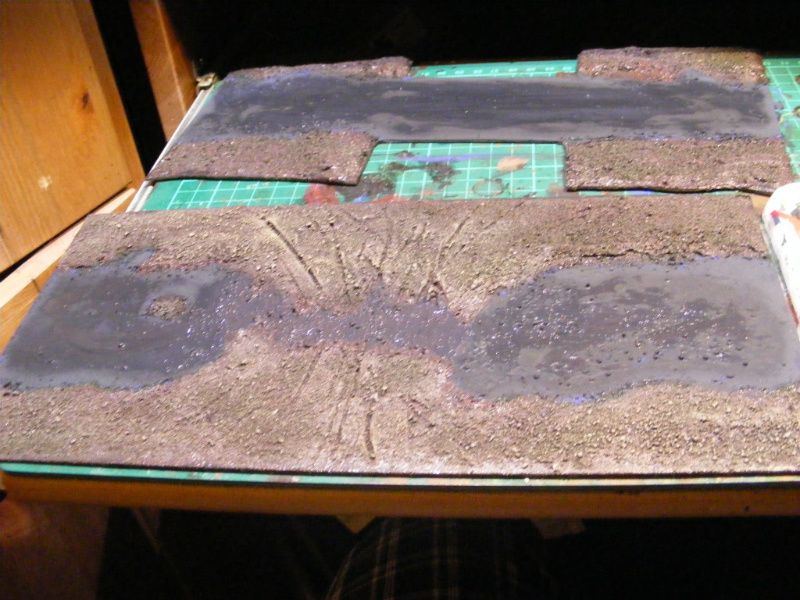
5. I then changed the technique slightly. I covered so areas with my normal basing mix but move of the pieces were covered using my new static grass applicator. This is a brilliant tool and I think that the effect achieved is great. Basically it makes the static grass stand up on end. Noch make one for over £100 that I am sure is excellent but it is out of my price range! I got mine off ebay for less than a fifth of that figure but it's worth every penny. Basically it is an electric fly swat with a tea strainer on the end. This charges the static grass so that it stands on end when it lands on the piece. The only snag is that it emitts a high pitch squeal when in use that our cats and African Pygmy Hedgehog dislike so I have to use it in another room.
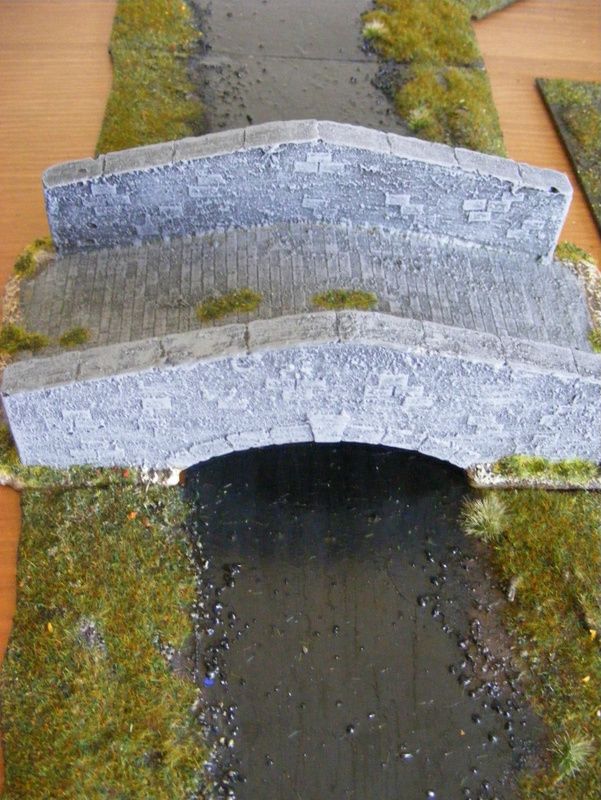
6. Obviously at this point the water looked far too matt so I added a layer of Army Painter Strong Tone Quick Shade dip. This gave a lovely effect with it's own colour although I might still add another layer of clear gloss varnish as it's not as shiny as say the liquid water effect that I've used elsewhere. The bridge is from PMC Games.
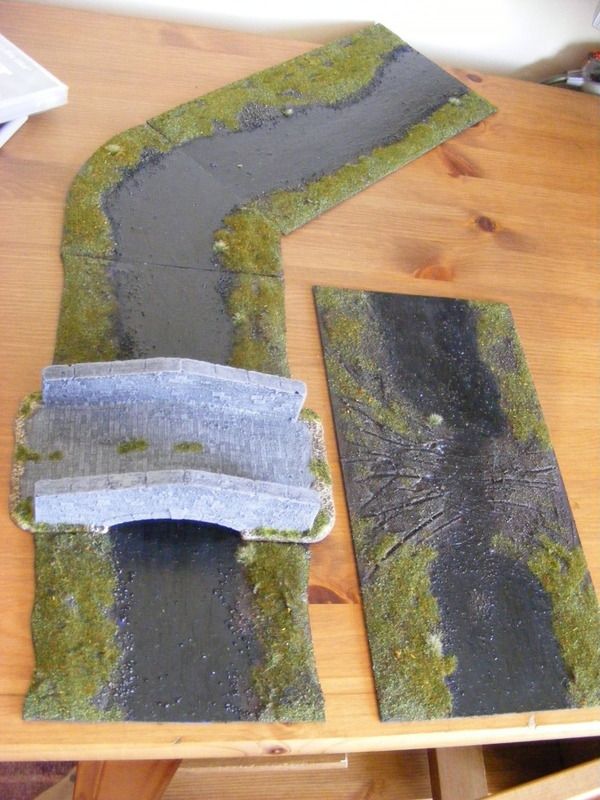
7. The final task was to add some extra texture to the surface of the water in the places where it would be flowing faster. I did this using Woodland Scenics Water Effects. I've had this in the cupboard for years and never tried using it. It went on well but it'll be another 24 hours before I get to see whether or not it looks any good.
1. I used the same flooring but used wider pieces to allow this to look like a small river rather than a stream. I built up the banks using the same pre mixed filler and then textured them with the same mix of powder and coral sand as I'd used for the roads.
2. I sprayed everything black and then painted it brown. I soon ran out of the original brown poster paint that I'd mixed for the roads so swapped to an emulsion tester pot that I'd found at the local Homebase that was pretty much the same colour. This had a much stronger pigment so went over the black undercoat better. I then drybrushed with English Uniform followed by German Camo Beige.
3. I really struggled to get the water colour right. Real rivers aren't blue although wargames ones often seem to be! Eventually I settled on a very dark blue/brown colour. It's not that true to life but seems to work ok. I deliberatly slightly undermixed the paint to give it a very subtly streaky effect to leave the colour less solid.
4. The whole pieces were then sprayed with Army Painter Matt Varnish.
5. I then changed the technique slightly. I covered so areas with my normal basing mix but move of the pieces were covered using my new static grass applicator. This is a brilliant tool and I think that the effect achieved is great. Basically it makes the static grass stand up on end. Noch make one for over £100 that I am sure is excellent but it is out of my price range! I got mine off ebay for less than a fifth of that figure but it's worth every penny. Basically it is an electric fly swat with a tea strainer on the end. This charges the static grass so that it stands on end when it lands on the piece. The only snag is that it emitts a high pitch squeal when in use that our cats and African Pygmy Hedgehog dislike so I have to use it in another room.
6. Obviously at this point the water looked far too matt so I added a layer of Army Painter Strong Tone Quick Shade dip. This gave a lovely effect with it's own colour although I might still add another layer of clear gloss varnish as it's not as shiny as say the liquid water effect that I've used elsewhere. The bridge is from PMC Games.
7. The final task was to add some extra texture to the surface of the water in the places where it would be flowing faster. I did this using Woodland Scenics Water Effects. I've had this in the cupboard for years and never tried using it. It went on well but it'll be another 24 hours before I get to see whether or not it looks any good.